Tuesday, June 2, 2020

87th Birthday Card For My Dad

It has been quite a while since I have posted anything on my Stampin' Up! blog. No I haven't signed up again as a Demonstrator, but I have finally had a chance to make something using my Stampin' Up! products. I have been keeping up with all that is new due to some good friends, but I had been busy teaching classes for Scrapbook Essentials BC for a while, and then I moved back to Alberta. Calgary to live with my daughter there for about 5 months, and then nearly a year ago we all moved to Lethbridge.

I am now making card kits for Scrapbook Parade in Victoria, and we mail things back and forth. If you wish to see what I design for the kits selling there, her is the link to my other blog, Aspiring to Creativity. If you go there, you can see the other two cards I made for my twin sisters. You see, my Dad and twin sisters all have their birthday on the same day! But since I used Stampin' Up! products for my Dad's card and not the others, I am only posting his on this blog.


I wanted to make an elegant masculine birthday card for my Dad, and I think I pulled it off.


You can see the layering in the above photo. If you remember me, I love layers!


I think this is one of my favourite tree stamps! And below's photo of the leaves...well I love them too. I only wish I had purchased the die set to go with the stamps. I never got around to it. So I had to cut them out with my fussy cutting scissors.


Well, that's it for this post. I hope that another two years doesn't pass before I post here again. I hope to use some Stampin' Up! products again. There are more family birthdays coming, so I hope I get the chance to use some of my favourites again.

Until then, Happy stamping and creating!


Saturday, November 17, 2018

More Bethlehem Edgelets - Long Cards

Surprise, surprise!

I am back again posting more cards I made using the Bethlehem Edgelets. You may not know this, as I do not often get the chance, but I love to make long or tall & skinny cards that fit into a #10 business envelope. This size is a little out of the ordinary, giving it a more unique look. That is what I did this time for this card design.


Because I am using Soft Sky, a discontinued colour but all I have at the moment, I was limited in the number of cards I could make with these colours. I am sad to see Soft Sky is no longer available, as it was one of my favourite Stampin' Up cardstock colours.

Let's have a closer look at the card, shall we.


I used a gold gel pen to trace around the outer edge of the Crumb Cake oval, and to draw the little stars over Bethlehem.


Again, I love the Bethlehem layers!


The oval is popped up too.


Well, that is it for now. I have had fun playing with the few Stampin' Up product I have access to at this time. I so look forward to having it all in a craft room again all at my finger tips.

Thank you for stopping by, and I hope you enjoyed seeing the fun I have had. I have to go back to my work in preparing samples for classes to teach at Scrapbook Essentials BC. So, it may be a while before I can post again. We will see. Maybe in early Spring....

In the mean time I say, Happy creating!


Friday, November 16, 2018

Life's Curve Balls & Bethlehem Edgelets

Hello Everyone, and Welcome!

Here I am! Are you surprised? I must apologize to everyone, I truly thought that I would have the time to create some personal Stampin' Up projects while teaching classes at the studio. Turns out that I have been busier than anticipated. I have really missed coming to this blog to post and share. However, I have wanted for quite a while to create Christmas cards using the Bethlehem Edglets, and finally have had the chance to do so.

I was inspired by a card creation I saw on Pinterest (could find the link to who created it) who used this die set, and the Star of Night stamp set. I had to be creative as I do not have the 'Star of Night' stamp set. But I do like mixed media, and happen to have stencils and paste that would take the place of the stamp set and add some texture to the card at the same time.

When deciding on the number of cards to make, I decided that a dozen would be good, as I wanted to make other card designs using this die set for this Christmas. So here they are!


The sentiment stamp you see is not Stampin' Up, as most of my Stampin' Up product is in storage and has been for a little over a year now. Here is what the card looks like.


I do not know if you can tell from the photo, but the smaller die cut star is cut from the 6 x 6 pack of glitter paper. The larger star is just Whisper White.


If you see some glitter on the white stencilled paste, that is because I put it there after the paste dried.


I sure like the layered look of the Bethlehem scene. This is a die set I will keep for a long time.


I am sure many of you that follow this blog, may have had this set for a while, but for me this is the first time I had a chance to use it. I plan on making a few more cards with this die set, so see you soon!

It was wonderful to post here again with some Stampin' Up product!

Happy creating everyone!


Friday, August 4, 2017

A Stampin' Up Play Date


Hello everyone!

It has been four months since I had to retire as a Stampin' Up Demonstrator, and I have missed the fun. I have been very busy teaching classes at Scrapbook Essentials BC along with my duties as a Spellbinders Educator. My fellow Stampin' Up Demonstrator group, the Seashore Stampers, contacted me about having a day to play with them, to have some fun and catch up on what is going on in our lives. A 'play date' as it was called by the group.

Unfortunately, by the time the date arrived, life has a way of changing plans, which was the case for three of the ladies of the group. So I did not get the chance to visit with them. Those of us that were able to make it had a blast! It was so fun to dig out some of the Stampin' Up supplies again and create, and everyone brought something for our pot luck luncheon, and the food was wonderful!

Here are some photos of the get together.


These are three of the wonderful ladies that could make it to the 'Play Date'. And below is a photo with me and two of them.


Next come the photos of the luncheon food. Unfortunately, I did not think to take the photos until after we each had our first serving.


I took photos of each individual item. First, it the Thai Spring rolls with peanut sauce, which are covered with damp paper towel to keep the rolls moist.


Then, someone had nearly the same idea that I did. Here is a bowl of watermelon with Feta cheese.


Next you see two bowls, and no, the one bowl is not filled with peperoni. It is gluten free beat crackers with seeds, which turned out to be popular with one person in particular. Glad that she liked them so much. I must admit that they are very good, or I would not have brought them.


And lastly, my salad. It is made with watermelon, blueberries, cucumber, Feta cheese, a tiny bit of mint, honey and poppy seed dressing.


OK, enough of that. I am thinking that you might want to see what I made that day. We were having so much fun visiting that I do not think we got much work done during those 5 1/2 hours, but I did get three cards made.

I have two grandchildren that have birthdays this month, so I decided that this was probably the only time I would have to get to making them. The first is for my grand-daughter that will be turning 10. I decided using the new Lemon Lime Twist and Berry Blast colours, would be a great colour combo for a girl that age.


Then for my grandson, who will be turning 12, I finally got to using some DSP that I was never able get around to using before, and is now discontinued.


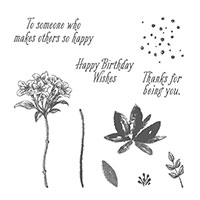
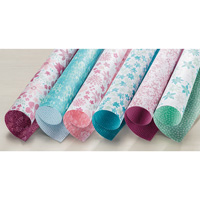
Then, as always, I never have enough Thank You cards, so I had time to make a quick one using some of the gorgeous new Delight Daisy DSP.


So, there you have the three cards made at the Seashore Stampers Play Date. I would like to thank the Seashore Stampers for inviting me to play with them again and visit with them. We had so much fun that we set a tentative date for another 'Play Date' some time in October. Looking forward to it!

It was four months ago I surprised everyone with the news of retiring as a Stampin' Up Demonstrator to pursue the Spellbinders Educator position; well, there is another surprise that I will be posting soon. So watch for it sometime in the next month or so.

In the mean time, I will be busy teaching classes, amongst other things, and wish you all a great Summer and happy creating!


Thursday, April 6, 2017

Retiring as a Stampin' Up Demonstrator


Hello everyone!

Today I am saying goodbye to you as a Stampin' Up demonstrator. I love Stampin' UP, but have other opportunities to pursue at this time that I can not pass up. I thank you all for following me here on this blog; also for being such great customers.

If you need to find someone to continue ordering Stampin' Up products from, email me and I will put you in touch with someone to help you.

I would also like to thank you for all the kind and sweet comments you have made on my creations over the past few years. This blog will remain here for the times that I can pull out my Stampin' Up stuff and create projects to share with you. Until I get into a good routine, I think the posts will be a little more sporadic, but hopefully a little more regular later on.

Again, thank you all so very much.


Wishing you all the best, and happy creating!


Saturday, March 25, 2017

Thinking of Easter Yet?


Welcome from MiRan's blog! This is a sad post for me, as it will be my Seashore Stampers Blog Hop post.


I love to create Easter cards, because it makes me feel like Spring is here or will soon be here.

There is no way that a Demonstrator can get all the stamps one would like, and it took me a while to get the "Circle of Spring" stamp set. I had the Christmas ones with the coordinating dies, so it only made sense to get the "Circle of Spring" as well to maximize the use of the dies. And with the new Watercolouring pencils, it is an ideal combination to create something really pretty for Easter.

It really looks like Spring by adding all those extra vines and flowers around the wreath of flowers. I both the photos above and below, you can see how I layered everything.


Do you see the flicked Wink of Stella on the card? It adds some lovely sparkle to the card. I stamped and coloured 6 of the circles, 4 of which I cut in half to create a larger circle of flowers around the single one...


...with the remaining cut up for the inside of the card.


You can see how I layered everything in this last photo. Oh, I forgot to mention that this card is 5 1/2" x 5 1/2".


 I think this card looks happy. It could also make a lovely wedding card, don't you think?

Even though this is the first time I have used this stamp, I hope it has inspired you to pull it out again and use this stamp again along with your water colour pencils. I know there is other inspiration from the previous blog posts, so you will have plenty of ideas now.

If you haven't seen the other posts yet, there links to hop from post to post below. Have fun hopping!

http://stampingforu.blogspot.ca/2017/03/seashore-stampers-blog-hop-easter.html


Bruni P
Erica E.
MiRan B.
Sabrina R. ...that's me!


Happy stamping & creating!


Wednesday, March 15, 2017

Dream Theme Blog Hop - Easter


Both my desktop and laptop computers went on the fritz within a week of each other. I just got them back from the repair shop just in the nick of time! It's Dream Theme Blog Hop time.

Welcome from Amy's blog!


Today we are sharing Easter creations! I have a card that involves a bit of fussy cutting using the SAB Avant-Garden stamp set and the beautiful Blooms & Bliss DSP. The piece of DSP I used reminds me so much of the cherry blossoms that fill many of our streets here in Victoria. Just this last Monday I noticed that a few of the streets were beginning to show that wonderful sign of Spring! I decided to create an A7 sized card this time (5 x 7) so that I could get a lot of lowers on the card.


It was an after thought to add the "Happy Easter" border which explains why it is upside down. I would have spaced everything better had I done is before adding the flowers. At least to me it looks upside down. In the photo below, you can see all the flowers and leaves I fussy cut after stamping, and arranged on the card. I decided that I did not want a monochromatic card and included yellow and blue flowers to the colour scheme. Colours associated with Spring colours.


In the side view below, you can see that I popped up the matted white rectangle as well as some of the flowers and the "Happy Easter" banner.


On the inside, I added my usual corner stamping. Since it is a larger card, there is plenty of space for it.


The next blog post to see is that of the very talented Jennifer!


https://stampwithamyk.com/?p=33548


http://paulinespapier.de/?p=12213


Be sure to leave these talented ladies some love.

Teneale Williams (Australia)
Patrice Halliday-Larsen (New Zealand)
Tracy May (UK)
Amy Koenders (USA)
Sabrina Radeck (Canada) That's me!
Jennifer Pauli (Germany)


Hoping our hop has given you some inspiration for creating your Easter projects!

Happy creating!